For this step, we recommend using a software called GIMP (GNU Image Manipulation Program) which can be downloaded at https://www.gimp.org/downloads/at no cost.
- From the schedule page, click on "Administration" ("Admin" in the Juno UI) to open the administration panel.
- On the left, click on the "Forms/eForms" tab to expand it, then click on the "Upload an Image" link.
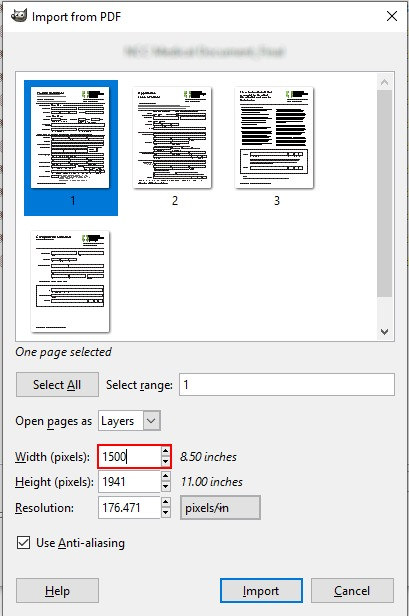
- Using the "Browse..." button, find the image you want to upload.
- Click on the "Upload" button.
- Repeat as needed for each page of the eForm.
- From the schedule page, click on "Administration" ("Admin" in the Juno UI) to open the administration panel.
- On the left, click on the "Forms/eForms" tab to expand it, then click on the "Manage eForms" link.
- Towards the top of the page, click on the "Create eForm" tab.
- Click on the "eForm Generator" option.
This will open the generator in a new tab of your Internet browser.
Navigating the eForm Generator
You will find below a brief description of each section of the eForm generator and its functionalities. For a more detailed guide, you can watch our tutorial video here: How to use the new eForm Generator.
Load Existing eForm
This allows you to reload eForms that have been previously built in the Juno EMR eForm generator so they can be modified.
Note that eForms that have been customized by our team will lose custom functionalities if updated through the generator in this way.
Page Setup
Allows you to set the page orientation, as well as select the background image for each of your eForm pages. Use the "+ Add Page" button to add pages as needed.
Form Building
The various tabs will allow you to select the type of inputs added to your form. The most commonly used tabs are:
- Checkbox: Allows you to add check and x-boxes, including pre-checked, and pre-checked by gender boxes.
- Text box: Allows you to add single and multi-line text fields on your eForm. The database tag checkbox allows you to set database tags to be used for each of the fields.
- Signature: Allows you to add a signature pad to your eForms.
You can refer to this page to know what each of the database tags available in the generator do.
Form Stylization
Select how your text borders will display both on the screen and when printing.
Finalize
Name your eForm and save it to the EMR.